
Turning your photos into artwork that you can scale is a skill every designer and creative person should know. When you take a picture, it is made of pixels. Pixels look fine on your screen, but if you try to enlarge it, the image gets blurry. This is where vector files come in. They are made of lines and shapes, not pixels. That means they can grow big or small without losing quality.Many people want to Convert Image to Vector File.
Doing this makes your artwork sharp, clean, and ready for print, embroidery, or any digital project. In this guide, I will show you how to take your photos and turn them into scalable artwork. I will share tips from my own work experience and show the easiest way to do it.
What Is a Vector File?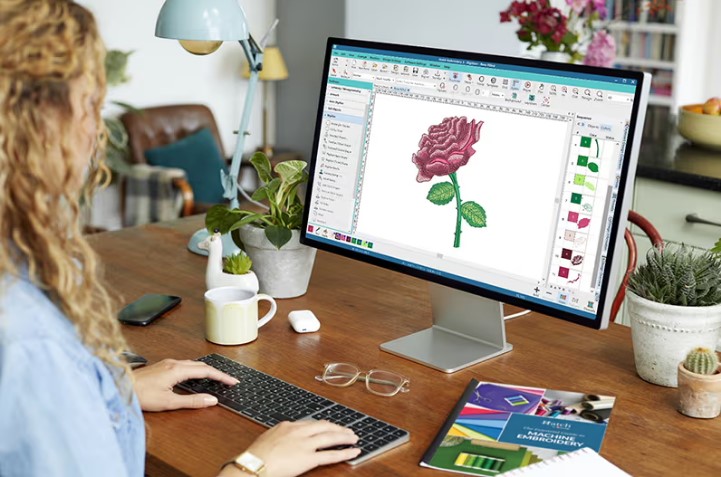
A vector file is different from a normal photo. Photos are made of pixels. Pixels are tiny squares that show color. When you enlarge a photo, these squares get bigger and the image looks blurry.
Vector files are made of math. Lines, curves, and shapes form the image. No matter how big you make it, it stays sharp.
Common Vector Formats
Some common vector file formats are:
-
SVG – Works on web and print
-
AI – Adobe Illustrator files
-
EPS – Works on many design programs
-
PDF – Can also hold vector graphics
Vector files are great for logos, illustrations, icons, and any artwork that needs to be resized.
Why Convert Photos to Vector Artwork
Photos are beautiful, but they have limits. Here’s why you might want to convert them:
-
Resize without losing quality – Perfect for banners, posters, or T-shirts
-
Easy editing – You can change colors, shapes, and lines
-
Use in embroidery or print – Machines often need vector or line-based files
-
Smaller file size – Vector files are often smaller than high-resolution photos
From my experience, having a vector version of a photo makes life much easier. I have worked on logos, t-shirt prints, and digital designs. Every time I start with a vector file, I save hours of work.
Step 1: Choose a Good Photo
Not every photo works well for vector conversion.
-
High contrast works best – Strong light and dark areas make lines easier to trace
-
Simple background – Too many details can confuse the software
-
Clear edges – Faces, logos, and objects with clear outlines convert better
From real work experience, I always ask clients for the highest quality photo. Low-quality images need more editing and the vector file may not look clean.
Step 2: Use the Right Software
You can convert images to vector files using different software. Some options are free, others are paid.
Popular Tools
-
Adobe Illustrator – Best for professional work
-
Inkscape – Free and open-source, great for beginners
-
CorelDRAW – Popular among print designers
-
Online Converters – Quick, but limited for complex images
I often use Illustrator for logos and Inkscape for smaller personal projects. Online converters are okay for simple shapes but not for detailed photos.
Step 3: Trace Your Image
Tracing is the process of turning a photo into lines and shapes. Most software has automatic tracing tools.
Manual vs Automatic Tracing
-
Automatic tracing – Fast, good for simple images, may need cleanup
-
Manual tracing – Slower, but gives precise control, perfect for complex designs
From my hands-on experience, I always start with automatic tracing to save time. Then I clean and adjust manually to make sure curves and edges are smooth.
Step 4: Simplify the Design
Vector files should not have too many nodes or points. Too many points make editing harder and file size bigger.
-
Remove unnecessary details
-
Focus on main shapes
-
Simplify colors and gradients
For example, a photo of a tree can be simplified to the trunk, leaves, and main branches. This looks clean and is easy to use for print or embroidery.
Step 5: Adjust Colors
Vector files let you change colors easily.
-
Separate layers for each color
-
Use flat colors instead of gradients for embroidery
-
Keep color palette simple for printing
I always check the colors with clients before finishing the file. This avoids surprises when printing or stitching.
Step 6: Export the File
Once the vector is ready, export it in the format you need.
-
SVG – For web and digital use
-
AI – If using Adobe Illustrator
-
EPS – If the design goes to printers or other software
-
PDF – Can also work for vectors
Before sending the file, double-check size, colors, and shapes. I usually export a copy in multiple formats to give clients options.
Step 7: Test the Vector File
Never assume it works perfectly after conversion. Always test:
-
Enlarge it to see if edges are sharp
-
Print a small version to check colors
-
Use in your target software (like embroidery or print software)
From real work, I have seen files that looked perfect on screen but had small errors when printed. Testing prevents wasted materials and time.
Tips From Real Experience
Here are tips I use every day:
-
Start with good images – Better source means better vector
-
Clean up edges manually – Auto tracing is never perfect
-
Use layers – Separate objects and colors for easier editing
-
Simplify shapes – Fewer points, faster editing
-
Save often – Keep original and working files separately
-
Test everything – Screens can lie, print shows the truth
When Free Tools Are Enough
Free tools like Inkscape are great for beginners or simple projects.
-
They let you trace images automatically
-
Export to SVG, PDF, or EPS
-
Edit basic shapes and colors
However, for detailed logos or professional printing, paid software like Illustrator is better.
Common Mistakes to Avoid
-
Using blurry photos – The vector will look messy
-
Too many colors – Printing or embroidery may be hard
-
Skipping manual cleanup – Auto tracing often leaves rough edges
-
Not testing – Always check the final result before mass production
-
Overcomplicating – Keep shapes simple and clean
Real-World Example
I once worked on a client logo from a smartphone photo. The photo had shadows and extra objects.
-
Step 1: Chose the main object and removed background
-
Step 2: Used Illustrator to auto trace
-
Step 3: Cleaned edges manually and simplified shapes
-
Step 4: Adjusted colors to match branding
-
Step 5: Exported to SVG and PDF
The result: A scalable logo that could go on a website, t-shirt, and banner without losing quality. The client was happy, and production was smooth.
Why Vector Files Save Time and Money
Vector files let you:
-
Resize without distortion
-
Use the design on different platforms
-
Make last-minute color or size changes easily
-
Avoid remaking artwork for different machines
From experience, clients who provide vector files save hours of work and reduce errors.
Final Thoughts
Turning photos into scalable artwork is not magic. It is a process.
Key steps:
-
Choose high-quality images
-
Use proper software
-
Trace carefully, clean up manually
-
Simplify shapes and colors
-
Export in correct vector format
-
Test before final use
With these steps, your designs stay sharp, professional, and ready for any project. Whether it’s embroidery, print, or web, scalable artwork makes your life easier.
From my hands-on experience, attention to detail is everything. Free tools or professional software both work if you follow the right process.
Take your time. Start with clear images. Plan your workflow. And you can turn any photo into artwork that lasts and scales perfectly.


Leave a Reply